> ## Documentation Index
> Fetch the complete documentation index at: https://docs.atomicnetworks.co/llms.txt
> Use this file to discover all available pages before exploring further.
# How to Make a Private Rust Server
> Learn about how to make your Rust server private with this easy to follow guide.
**Last Updated 3/16/24**
Making a private Rust server is useful when you don't want randoms joining your wipe. In this guide, you will learn how to make a server private for a specific Steam Group. This is useful if you are looking to keep your server exclusive to you and a group of friends.
You can create a Steam Group at [https://steamcommunity.com/actions/GroupCreate](https://steamcommunity.com/actions/GroupCreate)
Invite all the people that you would like to have whitelist access to your server into this Steam Group.
To copy the link ID for your Steam Group:
1. Go to the profile page for the Steam Group you want to give server access to.
2. Right click on the page and "Copy Page URL"
3. Paste the URL into a new page, append the following to the end of the URL: /memberslistxml/?xml=1
Example: `https://steamcommunity.com/groups/atomicnetworkss` turns into `https://steamcommunity.com/groups/atomicnetworkss/memberslistxml/?xml=1`
4\. At the top of this page, you will see a value labeled `groupID64`. Copy the 17 digit value.
Example: `103582791467876547` turns into `103582791467876547`
5\. Take note of your 17 digit `groupID64` value. You will need it for a later step in this tutorial.
Click [here](https://panel.atomicnetworks.co/login) to navigate to Atomic Panel. You can log in using your account credentials that you received following checkout. The credentials email is sent to the email address on file in the Billing Panel.
If you're not a current Atomic Networks client, [get started on a Rust server](https://atomicnetworks.co/rust-server-hosting) in less than half an hour. If you're already hosting with another Rust service, see [how we offer way more for way less.](https://atomicnetworks.co/rust-server-hosting)
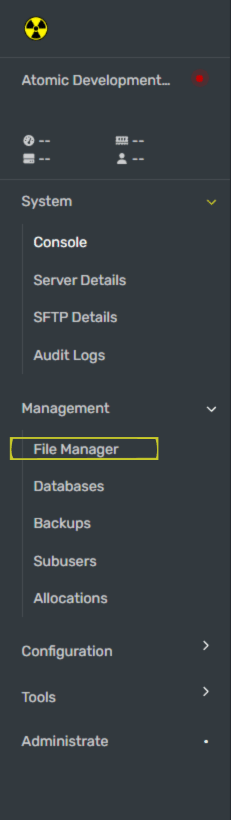 Navigate to the pathway `/home/container/server/rust/cfg/serverauto.cfg`
Add a line to this file called `Server.steamgroup ` where:
`` = The 17 digit `groupid64` value collected in step 2 of this guide.
Once you have configured your private server, restart your Rust server for the whitelist permissions to be updated.
Congratulations! You have just created a private Rust server!
Still having issues? Contact our support at [https://billing.atomicnetworks.co/submitticket.php](https://billing.atomicnetworks.co/submitticket.php)
Navigate to the pathway `/home/container/server/rust/cfg/serverauto.cfg`
Add a line to this file called `Server.steamgroup ` where:
`` = The 17 digit `groupid64` value collected in step 2 of this guide.
Once you have configured your private server, restart your Rust server for the whitelist permissions to be updated.
Congratulations! You have just created a private Rust server!
Still having issues? Contact our support at [https://billing.atomicnetworks.co/submitticket.php](https://billing.atomicnetworks.co/submitticket.php)